vsTASKER supports tiled map at different resolutions that must be combined using vsTerrainBuilder, from the output of TrekBuddy MapMaker utility.
in vsTASKER tool directory, extract the following file TBmm UI-2.0.7b.zip to wherever you want.
Open the folder then run Mapmaker.exe
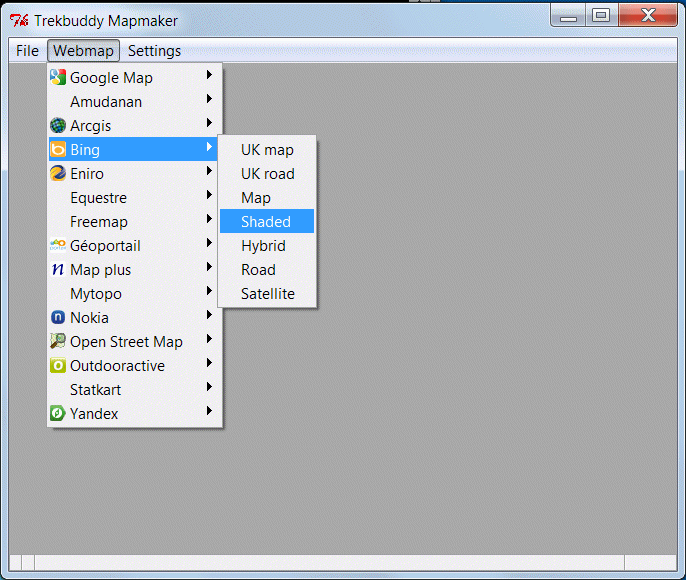
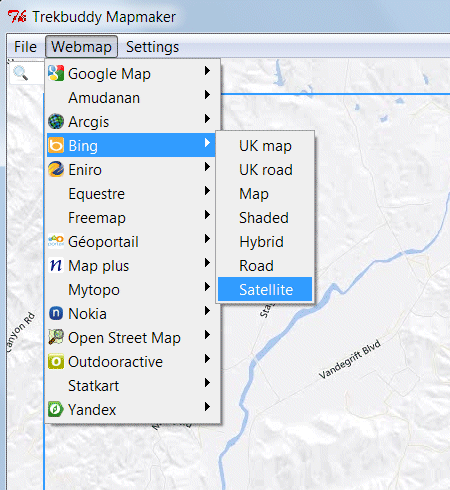
If you want to extract one area with several levels of details (you can add more but the concept is still the same), select one of the map provider in the Webmap menu (note that Google Map is not available since they decide to change their API to forbid such extraction and Trekbuddy Mapmaker has not being updated so far to adapt).
We select the Bing map provider, like below.
Move the map using the left mouse button.
Zoom using the mouse wheel.
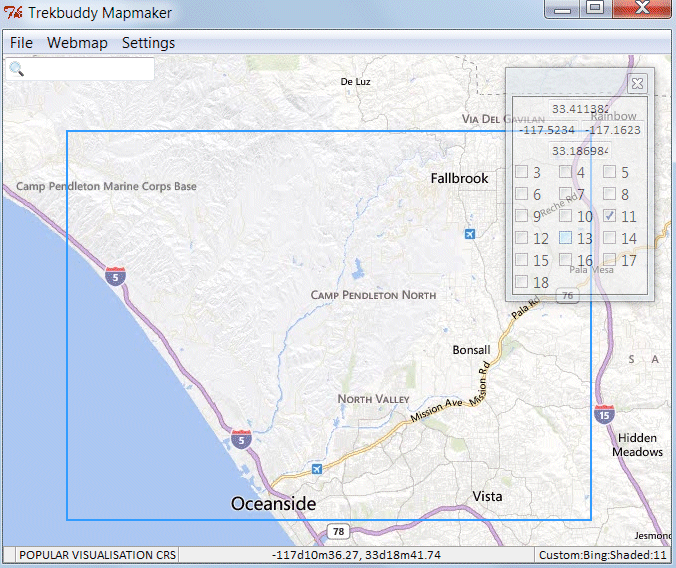
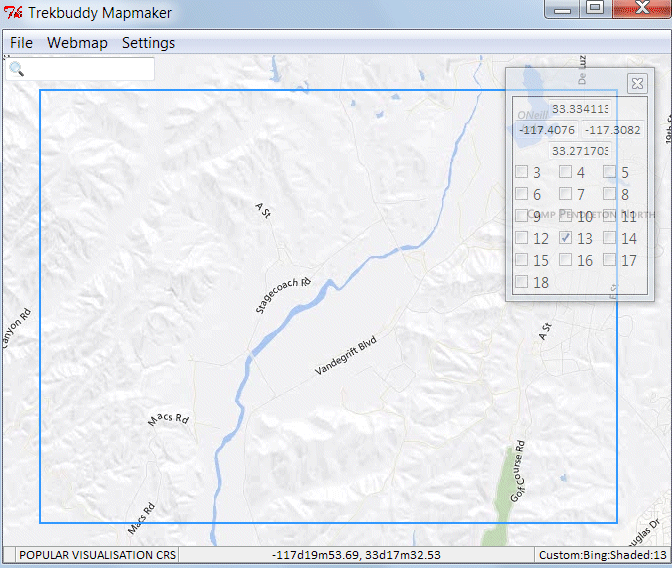
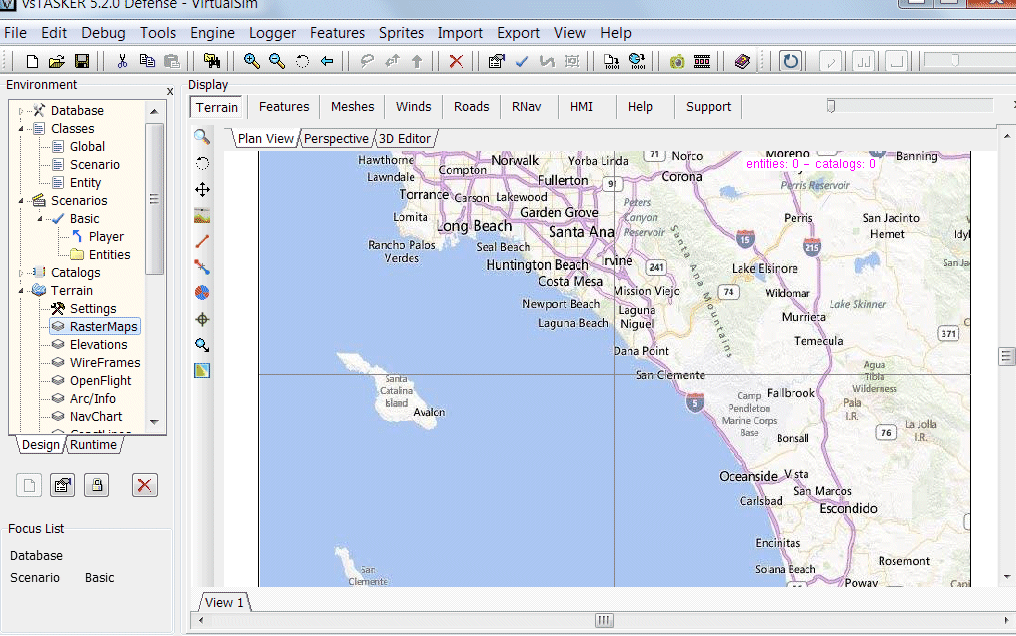
We zoom (using the mouse wheel) to get close to the Camp Pendleton in California.
Below is the first largest view we want.
We define the area to be extracted using the left mouse button (blue rectangular area).
The area can be resized using the mouse by approaching the corners.
You can see that the current zoom is 9 (bottom right value of the window).
So we will check the box 9 in the zoom extractor (transparent) window.
Trekbuddy does not allow multiple zoom level extractions so, we will do the operation several time.
Remind that the number of tiles depends on the zoom level and the area size. It is advisory not to extract too many tiles because, you might be restricted from the provider (Several map providers limits 10000 tiles a day per IP) but you will also need a lot of disk space. vsTASKER has a smart way of loading/unloading maps according to the region viewed and the limitation will not be on its side.
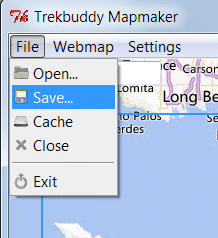
Once selected, you can extract the layer for the selected zoom level:
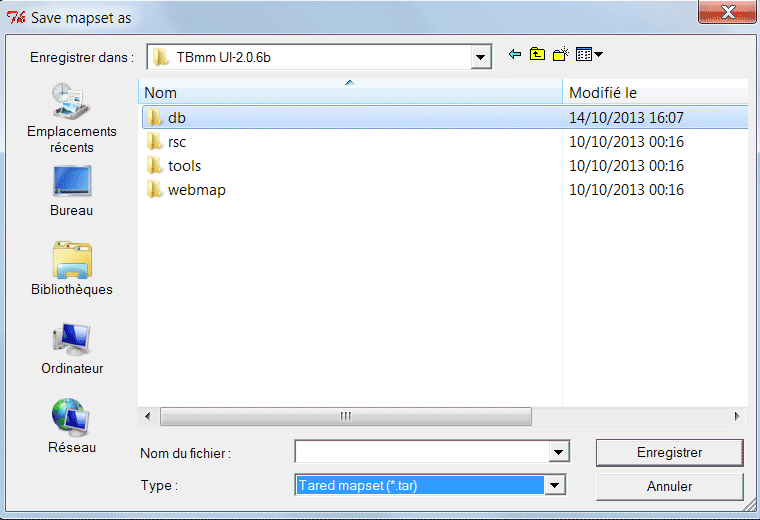
Select Tared mapset and create a sub directory in db/pendleton
Give a name of the layer that includes the zoom level, here, pendleton09
If the number of tiles to be saved in the tar set is not too high, you can also increase the zoom level without resizing down the area. Note that the number of tiles will be multiplied by 4.
Press ESC to get rid of the selection zone and zoom more towards Camp Pendleton (you can also uncheck the 9 box in the zoom window and check the 10 one then save again the pendleton10 layer, this is really up to you).
Here, I will continue extracting the pendleton11 tared mapset.
Until you get close enough to the area of interest.
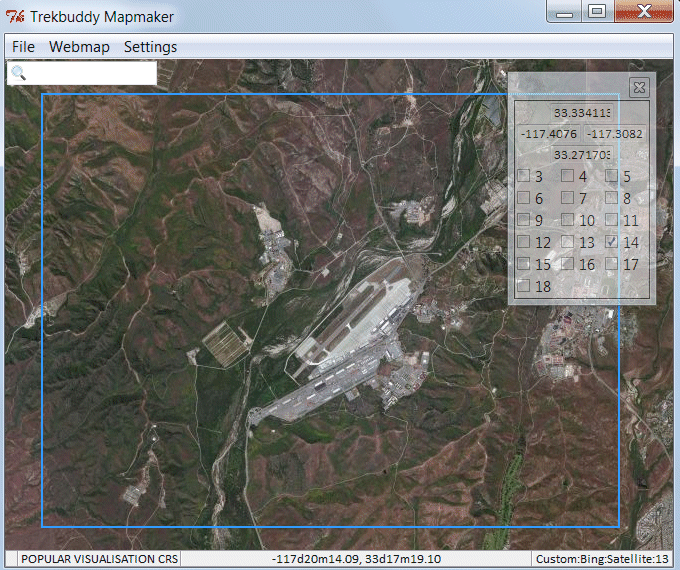
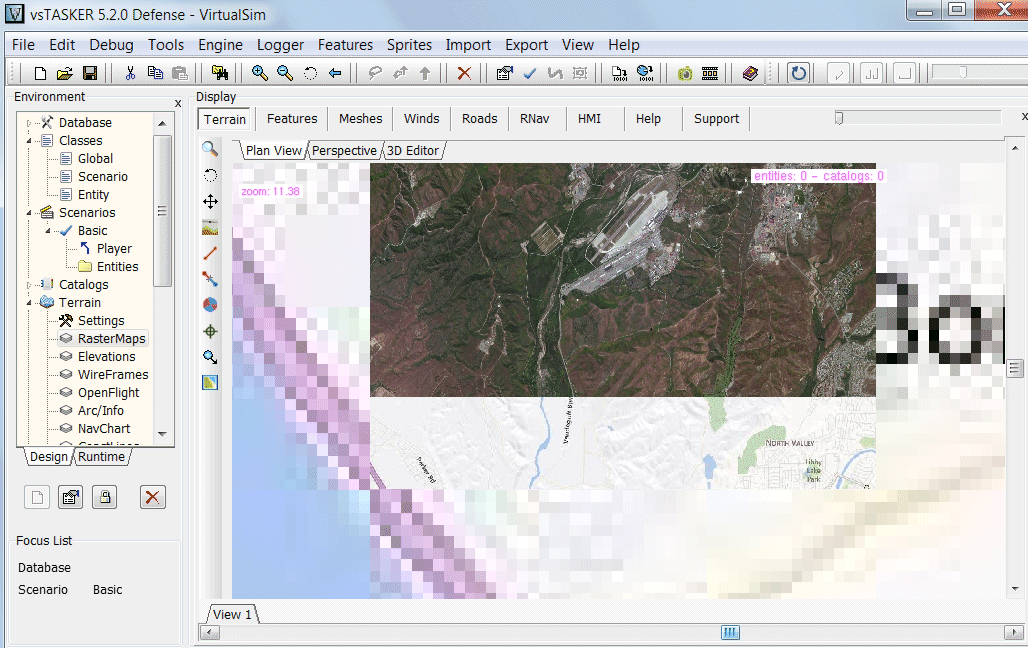
Then, extract the map layer at zoom 13 and change the source to Satellite.
|
|
Zoom levels do not need to be consecutive.
|
Also, you can extract more than one area at a specific zoom level and gather them into the same database. For i.e, two cities of a map can have high resolution for their downtown center but the area between them can remain in low resolution (less interest).
Then extract the satellite layer at zoom 14 and continue zooming in until you get to the resolution you want for your simulation.
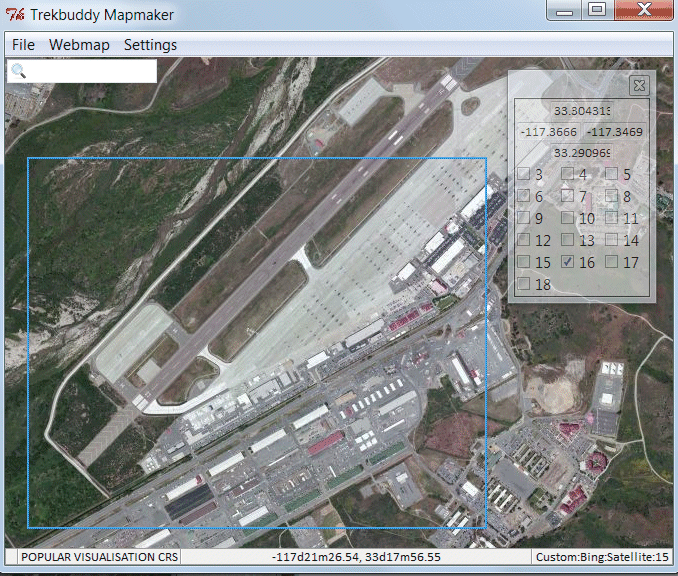
Below is the zone extracted at zoom 16
Once all the layers have been extracted and saved, time to unzip them in order to load them all into vsTerrainBuilder
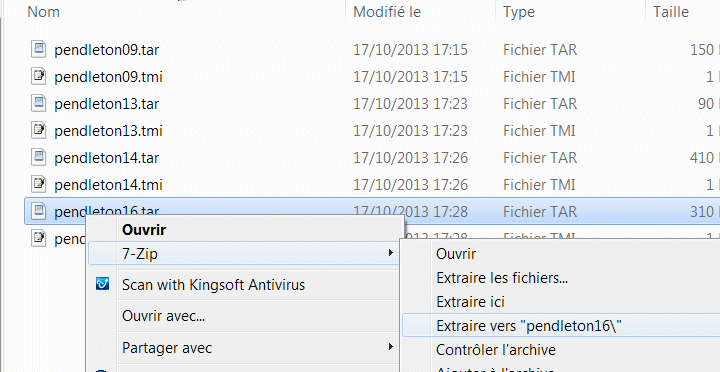
Unzip tared files into separate directories (we need to separate them because they all embed a /set directory with same filenames for image tiles. vsTerrainBuilder will be able to rename them according to the zoom level but until then, they all must be kept separated).
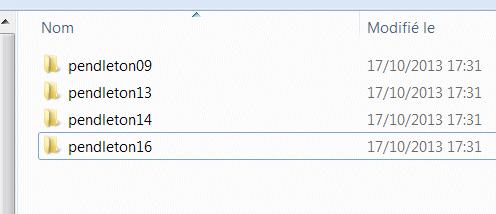
Once untared, you can remove the .tar and .tmi files and keep only the directories, like below:
|
|
Sometimes, Trekbuddy software stops to run. Just delete the directory (save the /db extracted map files) and unzip again the TBmm UI-2.0.7b.zip file.
|
Now, it is time to open vsTerrainBuilder
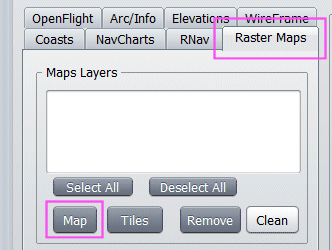
Select Raster Maps panel and click on button
You will now load all layers extracted by Trekbuddy from the smaller zoom value up to the higher one.
|
|
Do not use Tiles button, reserved for map files from OziExplorer format
|
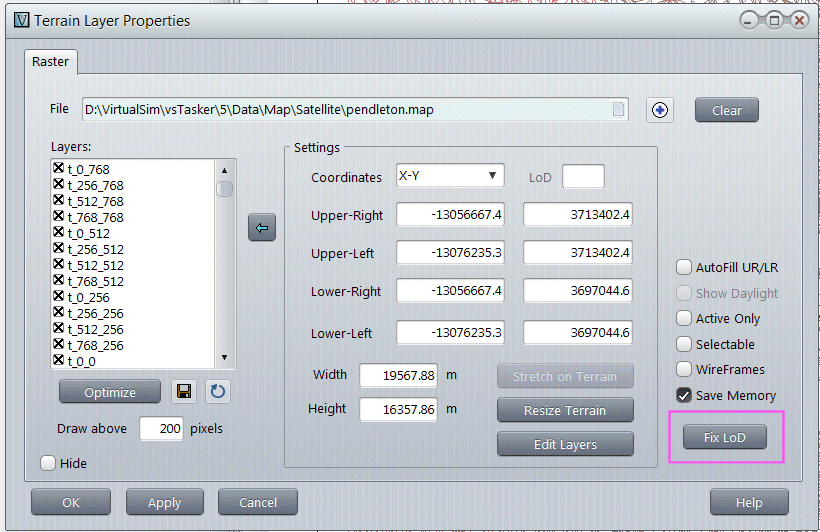
Add the .map file generated by Trekbuddy
Then, continue with all the remaining layers: pendleton13, pendleton14, pendleton16
vsTerrainBuilder should look like below:
Now export the database to /data/map directory using the button. Give the name Pendleton to the database file.
Close vsTerrainBuilder and open vsTASKER.
Select Terrain::RasterMaps layer and load the Pendleton .map file (the one vsTerrainBuilder has exported and not the Trekbuddy one!)
You can use Fix LoD if the database is not displaying correctly (zoom level mixed up) but then, do not forget to resave the map file with the

button (left, near button)
You can leave or set 200 pixels value for the maximum size a tile can be drawn before being replaced by a higher resolution sets. Between 150 and 250 is a good bet.
Click on Resize Terrain to move the terrain automatically around the loaded map area, then OK.
Zooming using the mouse wheel will automatically show/hide the higher resolution tiles imported into the map database.
|
|
It is good to keep the original untared TrekBuddy files as you might use them again to add more zoom level or zoom areas. You will need to go through the whole process from the vsTerrainBuilder tool without having to go back to TreckBuddy extractions.
|