First, you need to install the mySQL Workbench.
Install the following modules:
|
|
Make sure that the libraries and Windows SDK supported by Connector C matches the Visual Studio environment you are using.
For the above environment, Visual Studio 2015 (vc140) and SDK 8.1 have been used.
The x64 version of mySQL Connector C should be used with x64 libs of vsTASKER.
|
Set the environment variable MYSQL_C_DIR to C:\Program Files (x86)\MySQL\MySQL Connector.C 6.1
Start the mySQL server.
Start Workbench
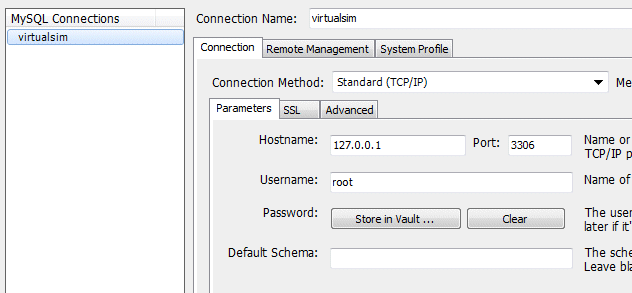
Create a mySQL Connection:
|
|
You can . If failed to connect to mySQL, check in your services that MySQL57 is up running (sometimes, in Manual mode, just Start it)
|
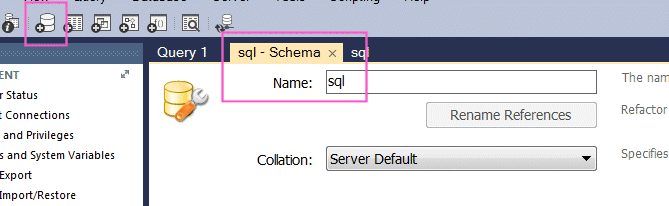
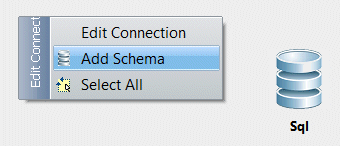
Create a schema and name it "sql":
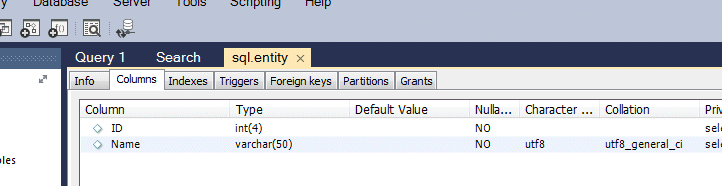
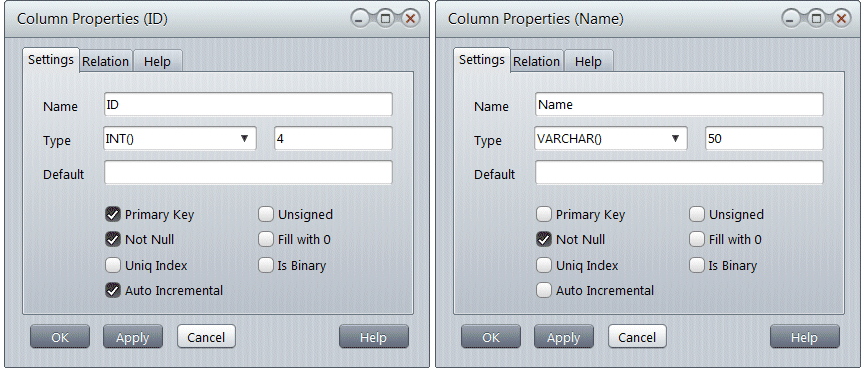
Now, let's create a Table named "entity" with two columns (ID, auto-increment, and Name, character string)
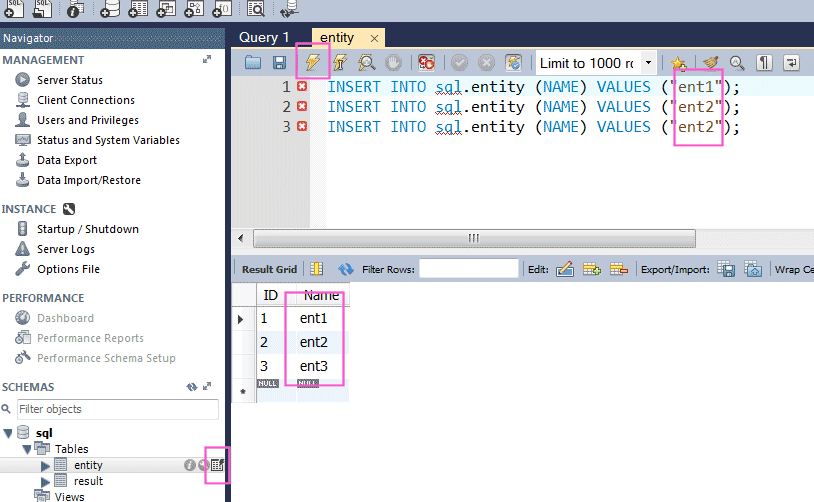
Time to add some data into the table (3 entities).
We now add "ent1", "ent2" and "ent3" entity names into the table from the panel (and check the result below):
INSERT INTO sql.entity (NAME) VALUES ("ent1");
In vsTASKER, set the Connection with the same host, user and password set in Workbench for the setup
See here for the setting.
Now, in vsTASKER, let's add a schema and name it sql:
Create inside this schema a read-only Table for entity input.
Let's call it "Entity":
This table will list all entities to add into the scenario an this table has already been created in Workbench below.
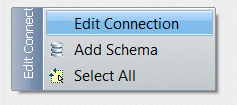
we need to set the Action to Open;
Then let's add 2 columns, ID and Name:
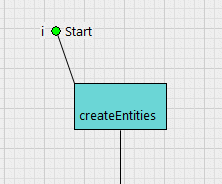
We need to create a logic that will query the table and automatically create the entities.
We will give this logic to the scenario player:
|
for (int i=0; i < db_sql.Entity.count(); i++)
{
TSqlEntity* item = db_sql.Entity[i];
WCoord pos;
pos.setRandom(1000); // km around center
Entity* ent = new Entity("basic", pos, item->Name);
ent->activateNow();
}
|
In the code above, we are using db_sql.Entity which is code generated.
db_sql is a generated structure that will contain all the tables defined in the active schema.
Each Open table produces a class of the same name with all the columns translated into class members.
At simulation start, vsTASKER simulation engine connects to the database and read all the SQL tables (in Open mode) to fill the actual local instances.
In the sample above, db_sql.Entity is an Array that will contain the three entries we added previously from Workbench (ent1, ent2, ent3) and they will be randomly positioned on the scenario by the Logic.
The same way as we did create the entity table in Workbench, as an input to vsTASKER, we will create one table inside vsTASKER for the mySQL database.
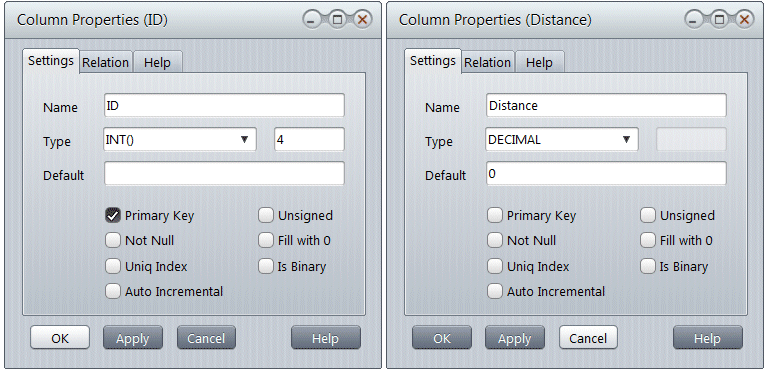
Let's call it "Result" and set the Action to Create.
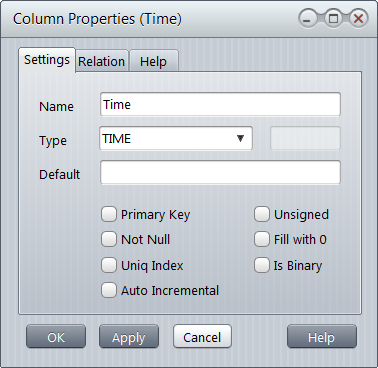
Now, we add three columns (ID, Distance, Time):
To insert result data into this table from vsTASKER source code, do the following, anywhere in a Logic or Component:
|
char msg[500];
sprintf(msg, "INSERT INTO Result (ID, Time, Distance) VALUES('%d','%d','%f')",
E:getId(), E:chrono.read("time_to_point"), L:dist);
mysql_query(db_sql.ptr, msg);
|
use mysql_query with the pointer to the SQL database and the message where you will put your SQL command using the standard syntax.
|
|
When running vsTASKER simulation engine connected to a mySQL database, if the simulation just die at launch, check the file /sim_out.txt for explanations. Often, the connection to the database could not be done (server not running, schema not found, permissions failed...)
|