In this demo, we will add two sprites. One input Sprite object: knob and one output Sprite object: lamp
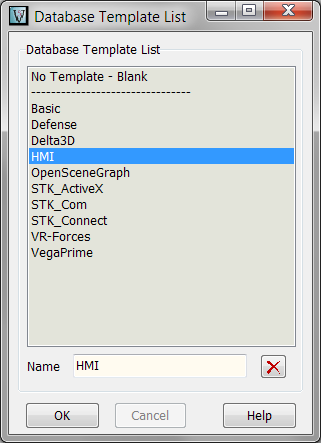
Let's create first a new Database by selecting the HMI template:
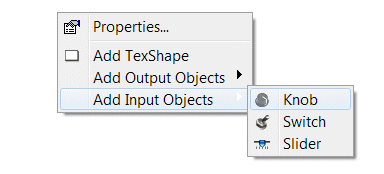
Now, let's select the Sprite pane and use the vertical toolbar to add the first input knob object:
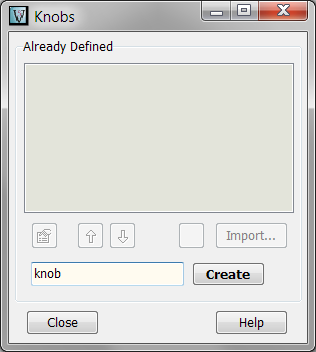
We can now call it knob:
press Create and click on the Area to set the Object:
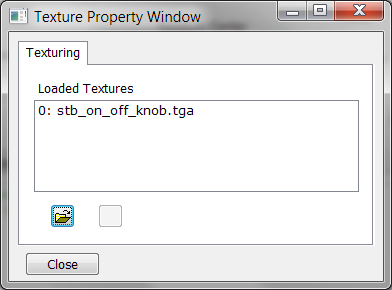
Let's open the Object properties by double-clicking it. We will load the the moving texture by clicking Visual Aspect button then Texture:
Let's select the stb_on_off_knob.gif texture:
|
|
vsTASKER uses TGA files for alpha channel transparency capabilities. But as windows does not display miniatures for TGA files, it is a good idea to have a GIF or BMP file with the same name.
At load, vsTASKER will check if a TGA extension file is available on the same directory and will use this file instead.
|
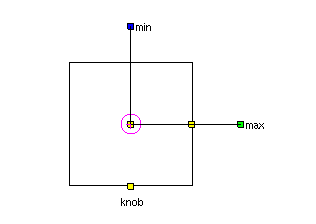
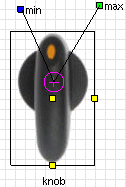
Offset the rotation center

of the knob above the texture center as below and rotate the min and max handle like below:
Now, let's add the Lamp Sprite:
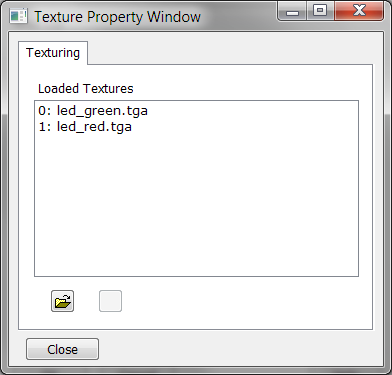
We need 2 states represented by 2 bitmaps: led_green and led_red:
|
|
The number in front of the texture name is associated with the state of the lamp.
|
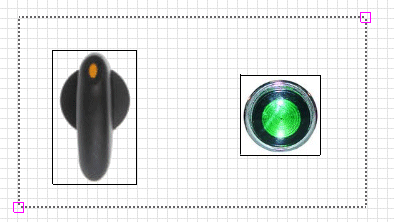
Once the lamp is created, set its position right to the knob, then click the runtime window area dashed line and move the square handle to enclose the two Sprites as below:
Now, we need to make the input knob activate the output lamp.
For that, we open the knob property window and we set the initial value and the runtime action:
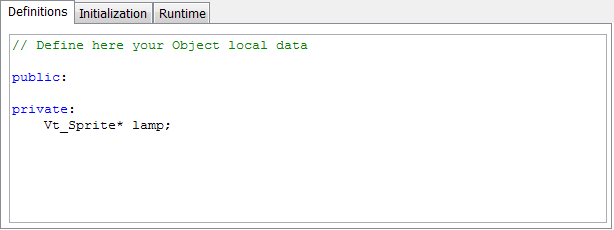
We need to hold the lamp pointer as the knob is going to activate it.
So, we define a Vt_Sprite pointer named lamp, in the Definition pane.
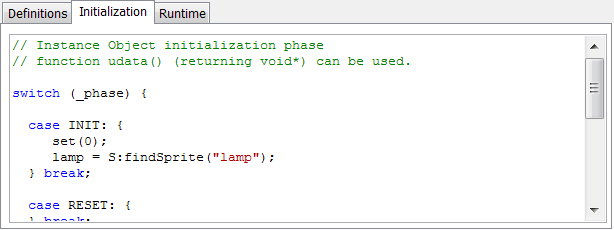
In the Initialization pane, we set the knob state to be 0: set(0);
Then, we find the lamp pointer using the scenario method: lamp = S:findSprite("lamp");
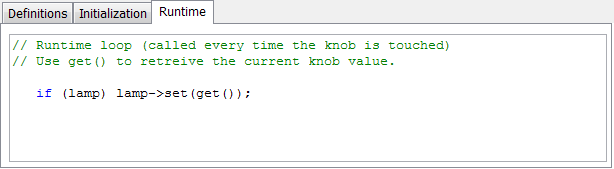
The Runtime part is called every time the knob is touched or position changed.
Here, we set the lamp state according to the knob state: lamp->set(get());