This sample will show how to create a basic component and attach it to an Entity.
The Component will be a 2Hz frequency module that will scan around the attached Entity up to a given distance (user defined) and will show a line to the detected Entity.
First, we need to create a Model that will hold as many Components (or Objects) as we need. Either we use an existing Model (like Sensors) or we create a new one.
Let's create a new one called: myModel
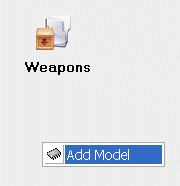
Select Models in the Environment Tree-List then, right-click the mouse then, Add a Model, like shown below:
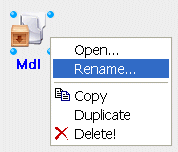
Now, right-click the new Model symbol and select rename.
Rename it to myModel then, double-click the Model symbol to open it.
On the diagram, right-click the mouse to add a Component (into the Model)
Import Component window allows you to select an existing component from the library.
You do not want that now as you will create a new component from scratch.
Select Cancel.
The component is then shown on the Diagram.
Double-click it to open it.
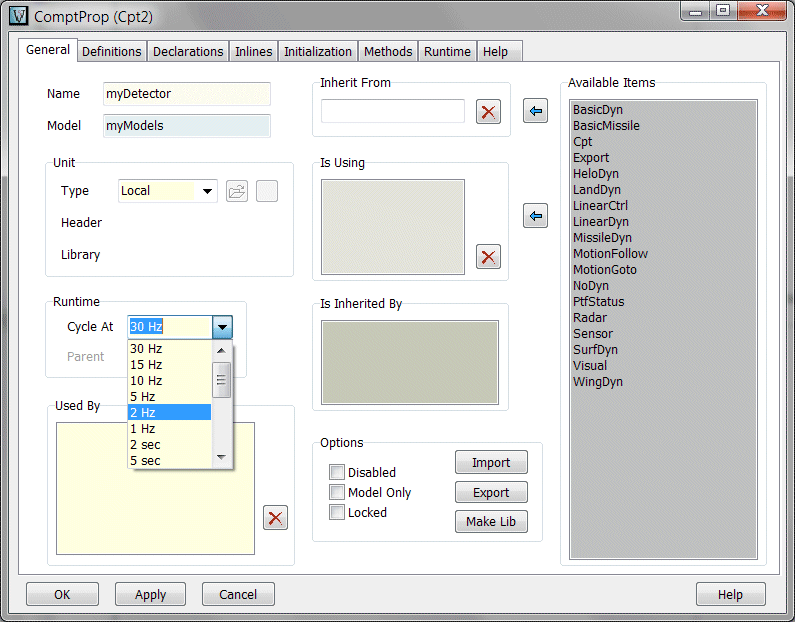
Set the name to myDetector and select 2 Hz in the Runtime Cycle at selector, as shown above.
We will define now the algorithm of the component.
In the Declaration pane, we will add a variable that will define the maximum distance for detection. We will make this variable GUI-dynamic by using //&& (see Interfaces)
max (integer) variable will be added into the Component Interface and defaulted to 100.
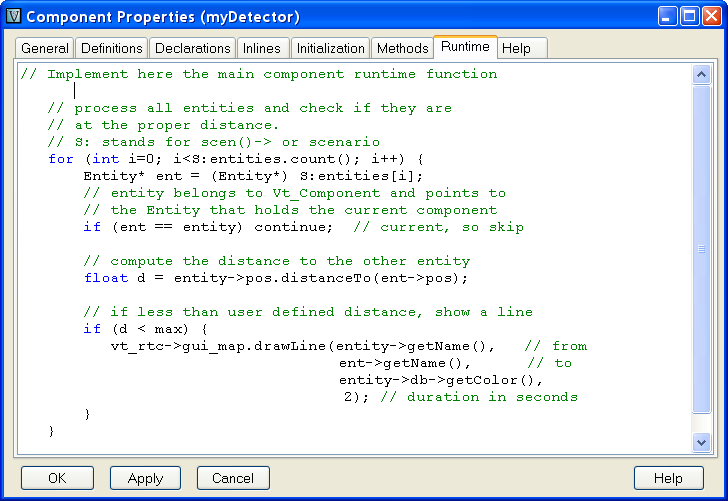
Now, let's define the main runtime loop.
|
for (int i=0; i<S:entities.count(); i++) {
Entity* ent = (Entity*) S:entities[i];
if (ent == entity) continue;
float d = entity->pos.distanceTo(ent->pos);
if (d < max) {
vt_rtc->gui_map.drawLine(entity->getName(),
ent->getName(),
entity->db->getColor(),
2);
}
}
|
Explanations are embedded into the code. See the Simulation Engine API for a deeper understanding of vsTASKER SIM classes.
Basically, in this algorithm, twice per second, all entities of the scenario will be processed (except the one that holds the current Component) to compute the distance to the component's owner. If the distance is less than the default or user-defined distance, then, a line will be shown on the GUI Map, for 2 seconds.
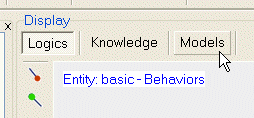
Now, let's add the component to basic Entity.
First, select basic Entity into the map.
Then, select the Models Pane on the Display area:
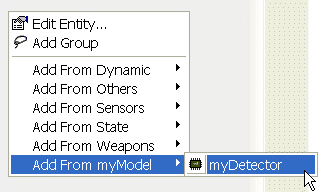
Then right-click the mouse and add the myDetector Component from the myModel Model:
The Component (model) will be visible on the Diagram, with the others:
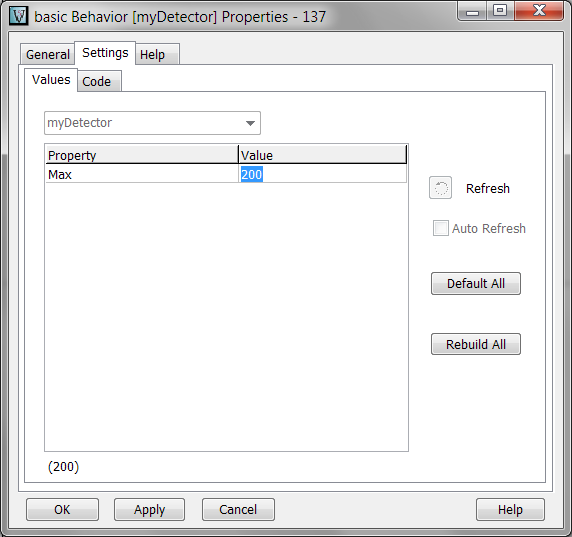
Double-click the Component (model) then, let's change the max value to 200
Set OK, then save, compile & run/start the simulation
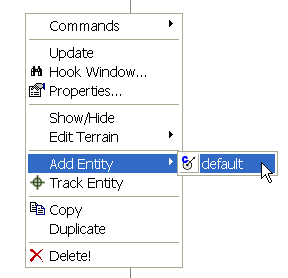
Now, we need to add one (or more) entities to the scenario to check the myDetector model.
Let's do it during runtime by right-click the mouse like shown below:
The new runtime entity will be added at the position of the mouse.
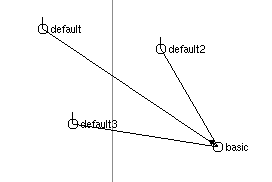
If the added entity is close enough to the basic entity, a line will be shown. As soon as the distance get beyond 200, the line will disappears.
To finish with this simple demo, let's now turn off the Component during runtime.
Select the basic Entity, then, the Model (behavior) pane, then double-click the myDetector component (shown in magenta because running) and click the stop button as shown below.
The lines will disappears as no detections are no more processed.