For this example, we will create a simple Logic that will make the basic entity of the previous example to move erratically on the map.
First, we need to create a Logic.
Select Logic in the Environment Tree-List then, in the Display diagram section, right click and select Add Logic
The Logic is created.
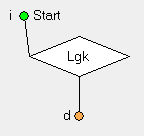
Double-click the Logic symbol (below) to Open it's definition.
Now, you can use the Logic toolbar to create visually the logic.
In this case, we will use two objects: Action and Delay.
Click on the Action button

of the Toolbar then drop it on the Diagram
Double click the object to open the Property Window.
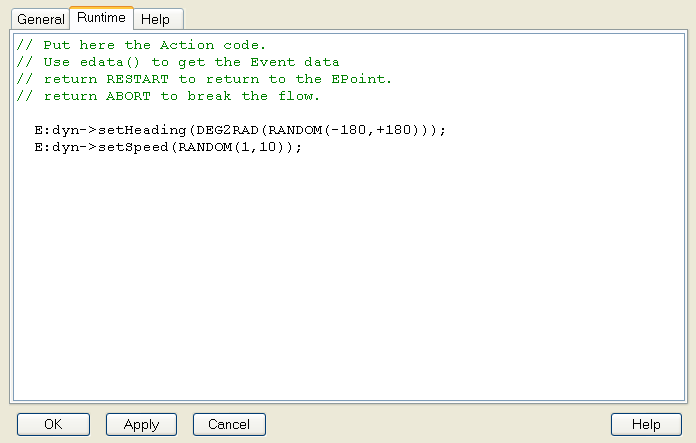
Set the Name to "divert" then select Runtime pane.
In the Runtime pane, you will enter the code that will be executed (by the simulation engine) as soon as the Action object is triggered.
You can enter here any C/C++ code that will (or not) use vsTASKER SIM API or any other API of third party environment (other CGF, drivers, CGI, etc.)
For this simple example, we want our entity to change its heading and speed, randomly.
Thus, enter the following code:
|
E:dyn->setHeading(DEG2RAD(RANDOM(-180,+180)));
|
E: stands for Entity and is a shortcut to ent()->
dyn: the dynamic object of the Entity. See Entity Class Declaration pane for more information on this object (defined in Models)
setHeading() and setSpeed() are virtual functions defined in model/include/basic_dyn.h
|
E:dyn->setSpeed(RANDOM(1,10));
|
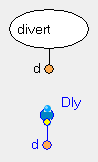
Close (OK) the window then, drop a Delay object below the divert Action.
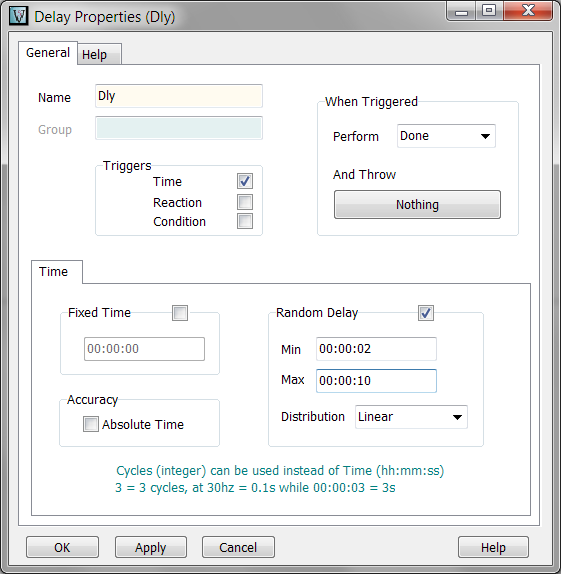
Double click the Delay object to set the random delay time.
Here, we want to add a Random Time Delay to stop the logical flux for a random number of seconds before changing again the heading and the speed of the Entity.
Let's click the Random Delay check button and set the Min time to 3s and Max time to 10s (see picture above).
Close (OK).
Now, we must add an Entry Point to the Logic. A Logic without Entry Point will never starts. We want to attach the Entry Point to the "divert" Action. To do so, select the Action object then click on the Entry Point

toolbar button.
Then, we must connect the exit arrow of the Action to the Delay object. For that, select the

and drag it close to the Delay object. Release the mouse when over one of the target blue anchor dots.
Do the same with the Delay exit arrow and return it to the Action object.
Now that the Logic is defined, it must be attached to the Entity.
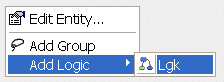
For that, select the Entity on the Map, then, on the Logic Entity Behavior pane (left of the Map when Entity is selected), right click the mouse, and add the Lgk (unnamed) Logic:
Now that the Logic is attached to the Entity, with a Start Entry Point, it will be executed at simulation start.
Time to generate the code, compile, and run the simulation.
During the run, select the Entity, double click the Behavior Lgk (see above) and see how the Action and Delay are triggered (use for magenta color for the active object)