vsTASKER 7 User Manual
×
Menu
Index

Settings

 
Settings
1

Can Zoom

1. Can Zoom
Check this option if the HMI design area can be zoomed or not. Default is checked.
 
2

Area

2. Area
Dimension of the HMI design panel, as visible on the desktop. Read only.
 
3

Grid

3. Grid
If checked, the HMI design work area will display a square grid for visually aligning Sprites.
 
4

Grid Size

4. Grid Size
Specify the size of the grid square in pixels.
 
5

Frequency

5. Frequency
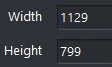
Set here the frequency at which the HMI thread will be called. This frequency will be the refresh rate of the HMI window. The lower the frequency, the jumpier the visual. For some panel that does not request high refresh rate, a low frequency will save CPU for the simulation engine (or the 3D stealth view).
 
6

Background

6. Background
Set here the HMI background color applied before drawing any sprite object. Default is white.
 
7

Disabled

7. Disabled
When checked, the HMI will not generate any code (even if Sprites exists) and it will be like deactivating it without erasing its content.
An empty HMI is like a disabled one.
 
8

Title

8. Title
Caption of the HMI panel at runtime (window title).
 
9

Dimensions

9. Dimensions
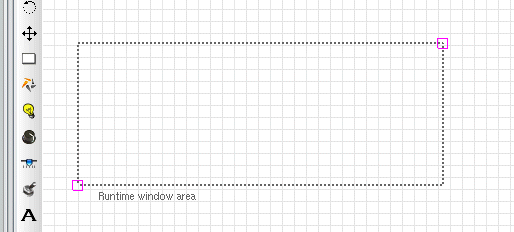
On the HMI panel, a rectangular dashed area represents the runtime (RT) window area. Sprites must be positioned inside to be visible.
If some Sprites are put outside the area, they will exist but not be visible. This can be used to replace some Sprites with some others just by exchanging their coordinates during runtime from the code.
Nevertheless, this area can be modified using the mouse or using the text fields.
To resize it using the mouse, just select the dashed line then drag any of the two magenta corners.
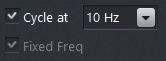
Left is the position of the left side of the RT window on the HMI panel, in pixels.
Bottom is the position of the bottom side of the RT window on the HMI panel, in pixels.
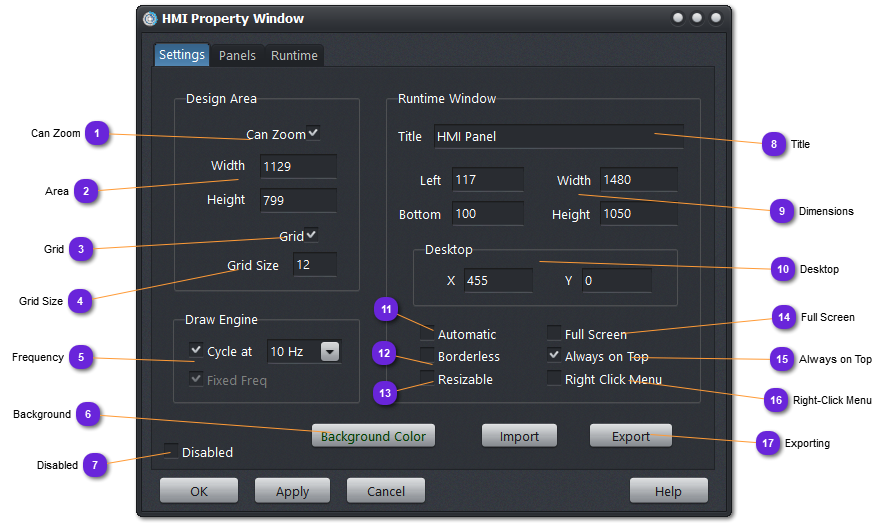
Width and Height express the size in pixels of the RT window.
 
10

Desktop

10. Desktop
Position of the runtime HMI top left window on the desktop.
 
11

Automatic

11.
If checked, the runtime window will automatically adjust its size to gather all defined Sprites. Otherwise, the manually defined runtime (dashed) window will be used.
 
12

Borderless

12.
If checked, the runtime window will display no title bar and no border.
This can be useful for incrustation on a part of the desktop or full screen.
 
13

Resizable

13.
When checked, the runtime window can be resized using the mouse.
 
14

Full Screen

14. Full Screen
When checked, the runtime window will adjust its size to the desktop size.
 
15

Always on Top

15. Always on Top
When checked, the runtime window will try to remain always on top of other windows.
This is a Window setup flag.
 
16

Right-Click Menu

16. Right-Click Menu
Select this option if you want to use the general built-in contextual menu using the right mouse button.
Unselect it for no binding.
 
The actual menu contains only the Quit option. It is Glut based so, it does freeze the display. A new OpenGL version will come in later versions for not freezing the simulation and allowing the user to control the content and the binding.
 
17

Exporting

17. Exporting
Use Export button to save the current HMI (including all Panels and Sprites) to a file in /Data/Shared with extension .hmi
Use Import button to load a saved HMI in replacement of the actual one (that will be erased).