The Common Image Generator Interface (CIGI) is a standardized interface between a real-time simulator host and an image generator. CIGI is an open interface offered to promote commonality in the visual simulation industry. vsTASKER is using the standard library and version 3.3 interface, available at http://cigi.sourceforge.net
Select
Networks, then CIGI for
tuning the CIGI host.
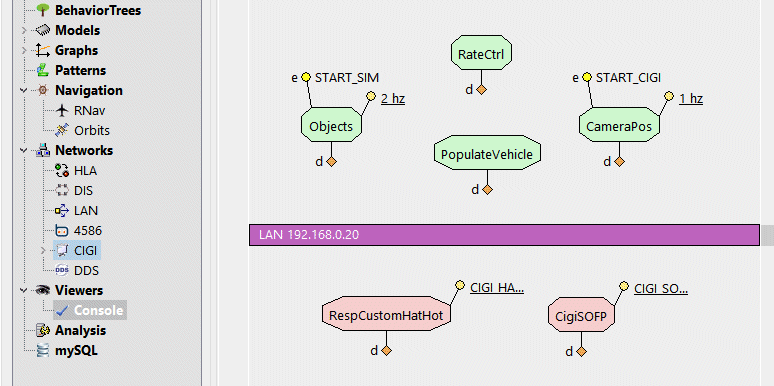
In the Environment, click on CIGI to access the data packets (Packets) definition pane
The area is made of two sections separated by the magenta line. Upper section is for the Sent packets (Host to IG) and Lower section is for the Received packets (IG to Host).
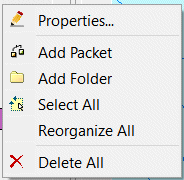
In the CIGI Packets definition panel, right click on the background:
: create a Packet that will be emitting or receiving data according to its position on the diagram (top for senders and bottom for receivers)
: create a new folder to store specific Packets. See
Folders to learn how to use them.
: select all Packet symbols (useful for moving or deletion)
: tries to reorganize the Packet symbols in the diagram so that to avoid overlapping.
: remove all the Packets of the current view. Cannot remove folders if not empty.
First, it is mandatory to set the Host and IG IP address so that both can communicate.
In the Packet definition background, right-click and select Properties to popup the settings panel.
See
here for the description of the
Settings window.
CIGI obeys to fixed rules and sequences. Most of the messages from the Host to the IG do not request a response. If such is the case, because the response is asynchronous (most of the time), a mechanism must be set in place in order to treat the answer appropriately. vsTASKER provides the mechanism to process such asynchronous response without blocking the simulation.
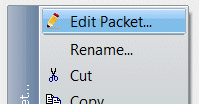
To a Packet, right-click in the proper section: Upper for Host to IG and Lower section for IG to Host messages.
Then select it and the Packet.
See
here for the property window of the
Packet.
A CIGI simulation may not need to use all the message packets listed in the standard. The Definition part acts like a repository for available packets. The list can be imported from a database, including proprietary packets of a vendor (if any).
The easiest way is to import a CIGI predefined list of supported packets (Data/Shared/CIGI/default.cigi or vbs-ig.cigi)
Otherwise, create it packet by packet as explained below.
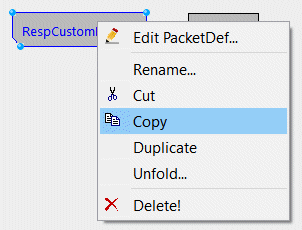
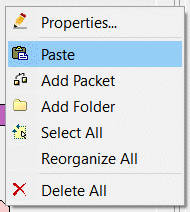
To instantiate a definition packet, select it, it:
Then it in the proper section of the Packets panel (and inside the proper folder if needed)
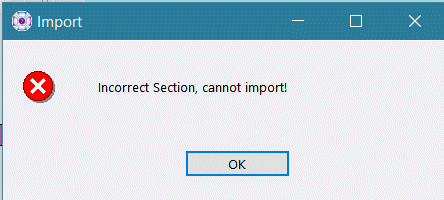
Pay attention to the Mode of the Packet definition. A Sending Out To IG mode can only be pasted into the Send section (top) while a Receiving from IG can only be pasted into the Receive section (bottom). Failing to do so will result in an error message:
|
|
As the number of packets can become big, the display zone will not be enough and will end up messy.
It is a good practice to create folders (which can be embedded) to group similar packets together.
|
Refer to the Tutorial document to learn how to develop your first CIGI simulation.