To properly display this page you need a browser with JavaScript support.
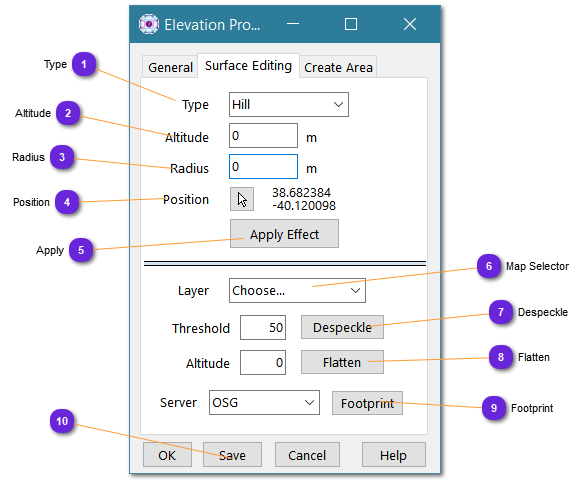
Use this panel to modify the elevation terrain profile.
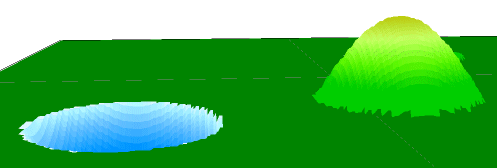
The alteration added is either a smoothed hill or cavity.
Type Select here the type of alteration you want to add on the terrain (Hill or Cavity , see image below)
Altitude Set here the altitude (amplitude) of the alteration, meaning, the highest (or lowest) point of the added hill (or cavity )
Radius Width of the base of the alteration.
Position Use the arrow button to select on the terrain map the center of the alteration that must be added on the actual terrain.
Mouse will change to a + for position selection on the map.
Apply Apply the alteration (hill or cavity ) on the terrain, at the specified position.
Map Selector Select from the list of elevation layers the map to work with.
Despeckle Use this option to remove artifacts that might appears after conversion or import from raw data source.
The value is the minimum burst or delta altitude between three consecutive plots (horizontal than vertical scan).
For i.e, a-b-c , three consecutive horizontal altitudes (plots). If a and c are almost identical (+/- one meter) and if |b-a| > threshold , then b will be computed as mean between a and c .
Flatten Force all altitudes in selected map to be equal to the left value.
Footprint Will build the elevation layer using the terrain server selected on the left.
When CIGI is selected, the IG must be running and the CIGI setting must have been set prior to use this function.
Save Save the altered elevation terrain file (otherwise, alterations will be lost as they are not saved with the database)